You need to do the following steps for changing front-end files
If you want to change in front-end file you need create same directory structure in extend directory located in (your-project\resources\views\extend) as your file has for example
You want to change in freelancer-show.blade.php file, freelancer-show.blade.php file located in front-end\users\freelancer-show.blade.php
Create directory front-end\users in extend directory. if extend directory dose not exist please create extend directory in views folder.
Copy freelancer-show.blade.php file in extend\front-end\users directory you created.
Now you can change html code in this file.
2. How to get into admin panel
How to get into admin panel
There is no specific URL for the admin panel. Same panel would be used for the admin
You can login to admin account with below details, and you can change the details from admin panel as well
Translation of strings is termed as localization in laravel official documention.
You can change language according to your need in worketic by following the steps given below.
Go to project main folder you will find "resources" folder e.g worketic > resources
There you will find a folder named "lang"
In which there are language folders like "en", "de" etc.
If your required folder exist then you need to do the following steps for translating or changing words
you can find 6 files containing application translation you can change words value as you required.
you can find most of the translation in lang.php file.
Create New Language
If your required folder not exist then you can create new language by following steps
Create your language folder with its code name e.g "en", "de" etc.
Copy all the files from "en" folder and paste it in your folder that you want your application to be translated in.
All files contain the translated strings of the whole application. You have to translate all files manually.
Go to project main folder (root) -> app folder -> Helper.php
Open Helper.php find (getTranslatedLang) function add your created language in list e.g 'fr' => array(
'code' => 'fr',
'title' => 'French',
),
Go to Admin Dashboard -> General Settings you will find "Language Settings" option if you do previous step correctly you will find your language in the dropdown as shown in image below.
select your language and click save.
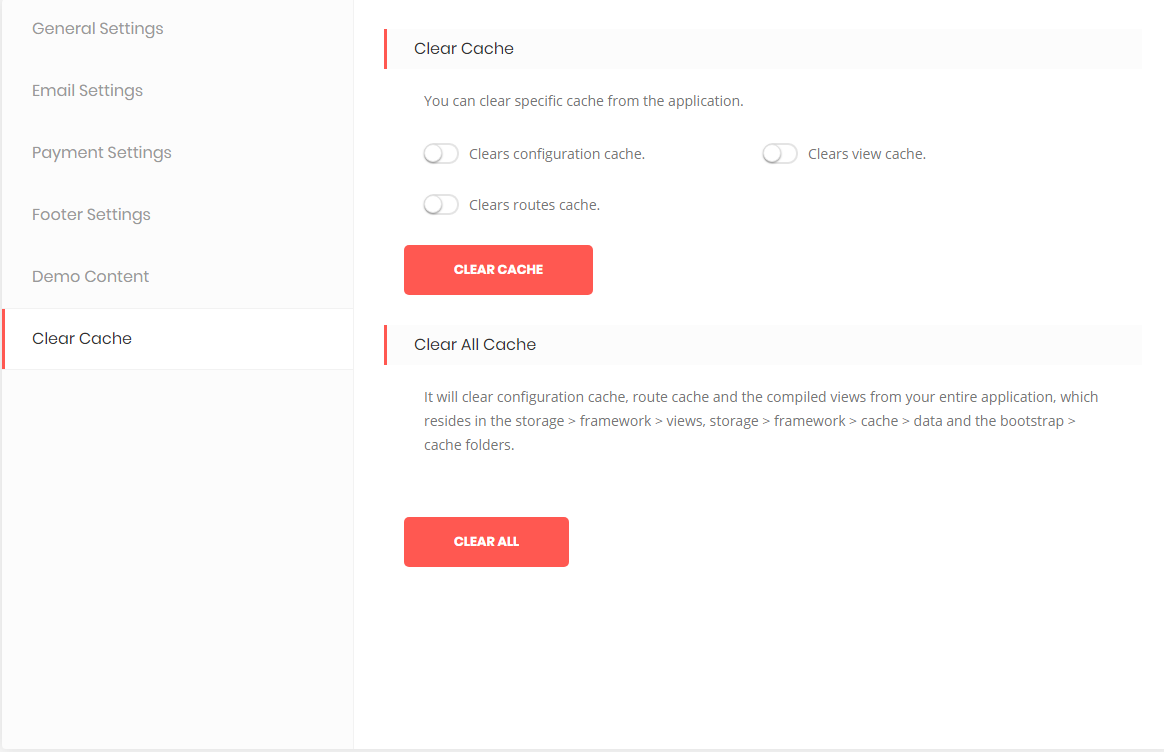
If language not change then go to Admin Dashboard -> General Settings > Cache clear or clear all the cache from there as shown in below image.
For more information regrading translation in laravel you can consult its documention Laravel Localization
Below are the server requirements for the laravel application's
PHP version= 8.0
OpenSSL PHP Extension
PDO PHP Extension
Mbstring PHP Extension
Tokenizer PHP Extension
XML PHP Extension
Ctype PHP Extension
JSON PHP Extension
BCMath PHP Extension
Fileinfo PHP Extension
Laravel version = 5.7
Node.js
max_execution_time = 300
max_input_time = 300
memory_limit = 512
post_max_size = 50M
upload_max_filesize = 50M
7. How to Activate Offline Bank Payment
In offline payment mode when user purchase package or hire freelancer, he/she needs to pay in admin bank account manually, after payment user needs to submit bank slip for payment verification, then admin verify bank slip and change payment status to completed manually. In online mode payment can be made way PayPal or Stripe payment getways.
You can enable or disable online mode from admin dashboard payment setting if you disable online mode then offline bank payment mode is active
If offline bank payment is active then you need to add admin account detail for receiving payment
Also you need to set Email Template from offline order settings
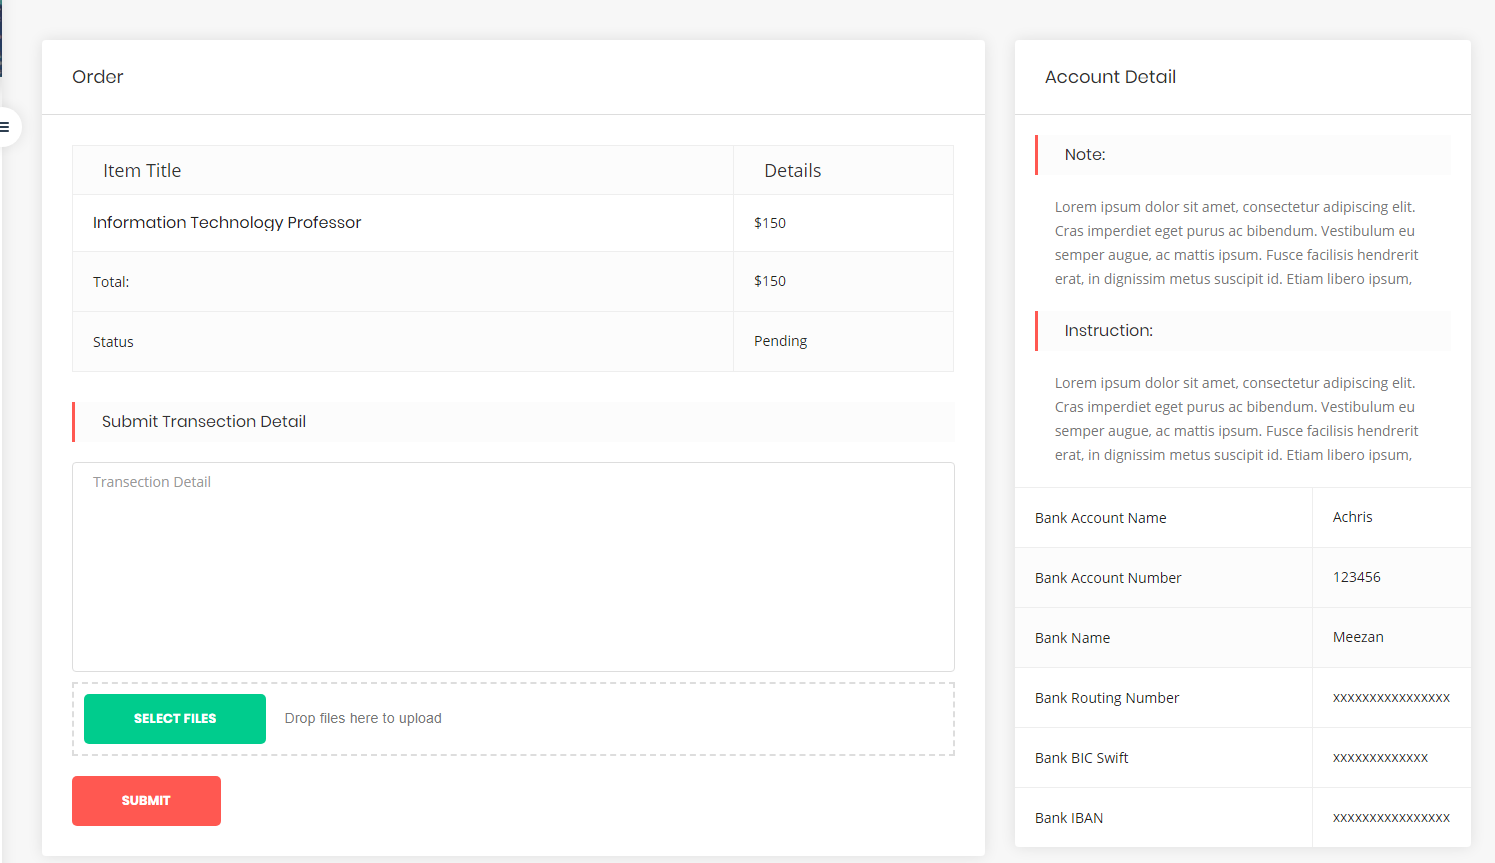
When user try to hire or purchase package then he redirect to order detail page from their he/she enter transaction detail or update bank payment slip. User can find admin account detail from sidebar in which user paid.
After submit transaction detail admin receive email and can update order status from his dashboard
Please note real-time chat will only work if your server does support node.js and you are allowed to run forever commands to run server file. Mostly VPS and Dedicated servers allow you to run node server files.
First make sure that you have installed node and npm installed on your server.
Either its shared hosting or dedicated hosting, and also make sure from your hosting provider that the port is enabled on which you have sending requests.
On shared hosting contact to your hosting provider and ask them to install node and npm, so you can easily run index.js file by writing this command node index.js from the terminal.
In case of dedicated server you have full access to install node and npm.
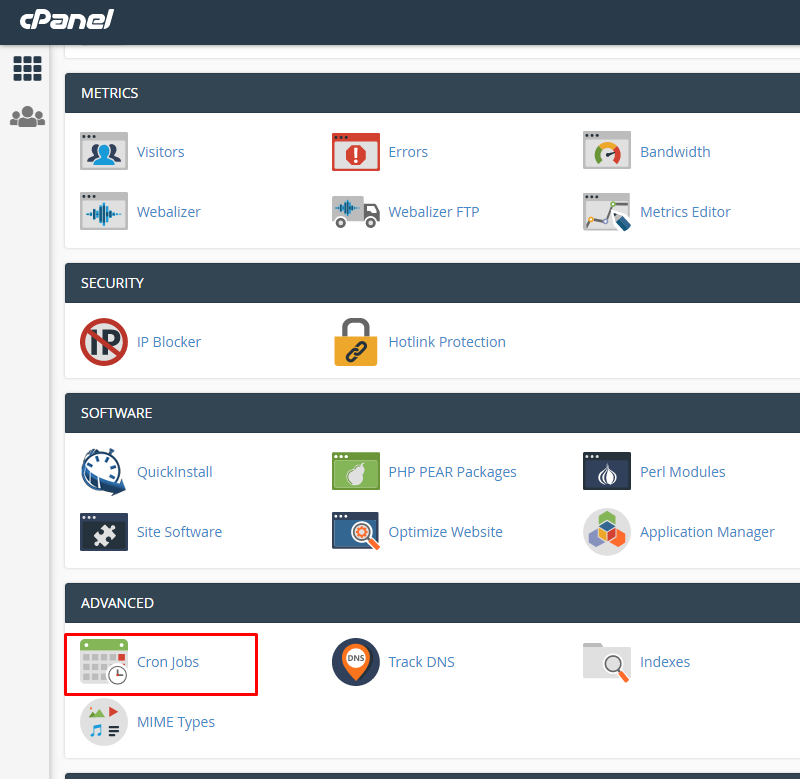
After verifying please ask your hosting provider to run index.js file through SSH commands
If you have not used any SSL certificate for your domain then without any problems you can run node chat server file. Just follow the below instructions.
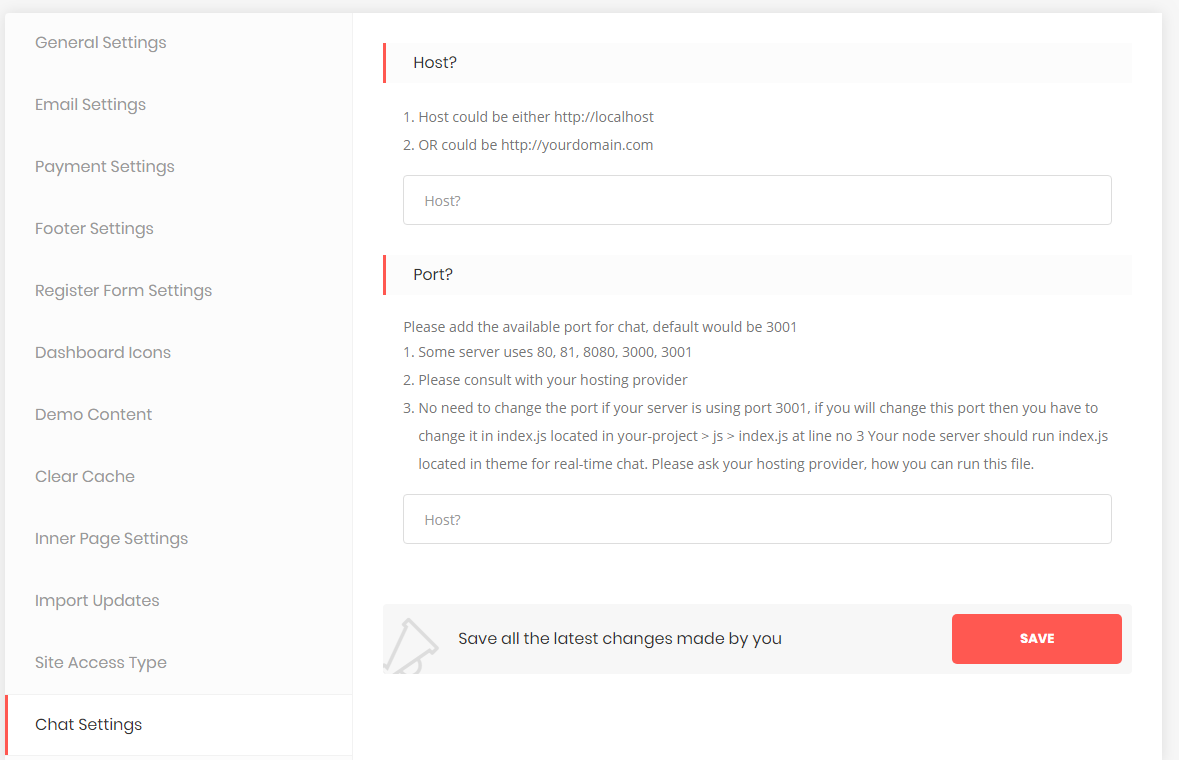
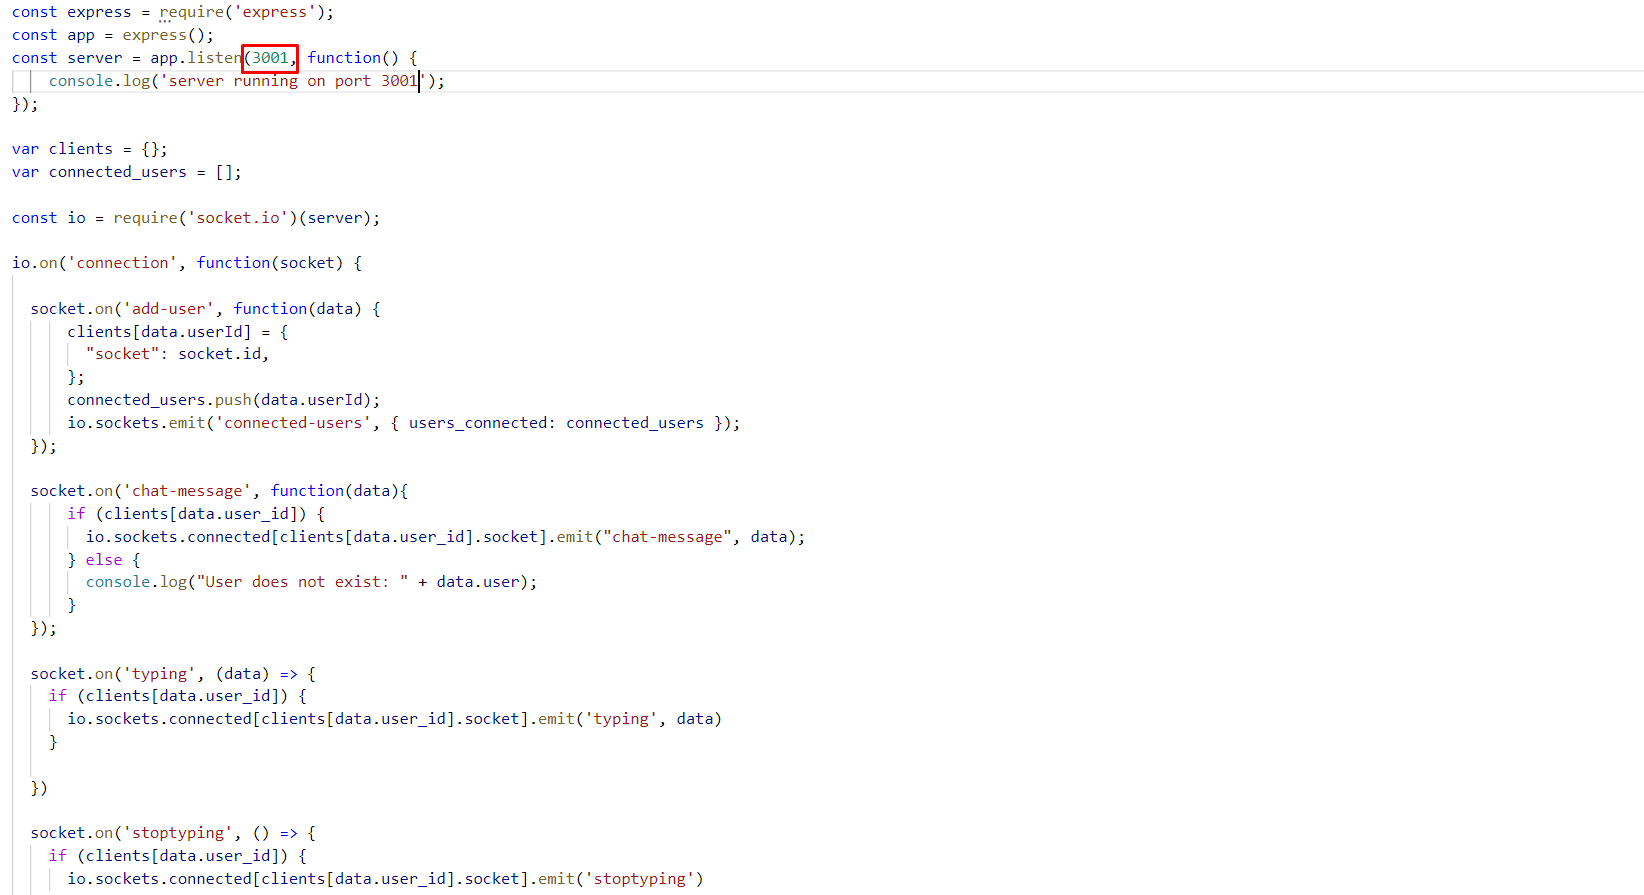
Please ask your hosting provider to run index.js file through SSH commands, index.js file is located in (your-project > js > index.js) Please ask your hosting provider how we can setup node server file. You need to set server host and port from chat settings
Note: if you have used port other than 3001 then please update port in index.js as well.
In simple inbox system, users will get messages on page refresh while in real-time chat system users will get instant messages without refreshing the page.
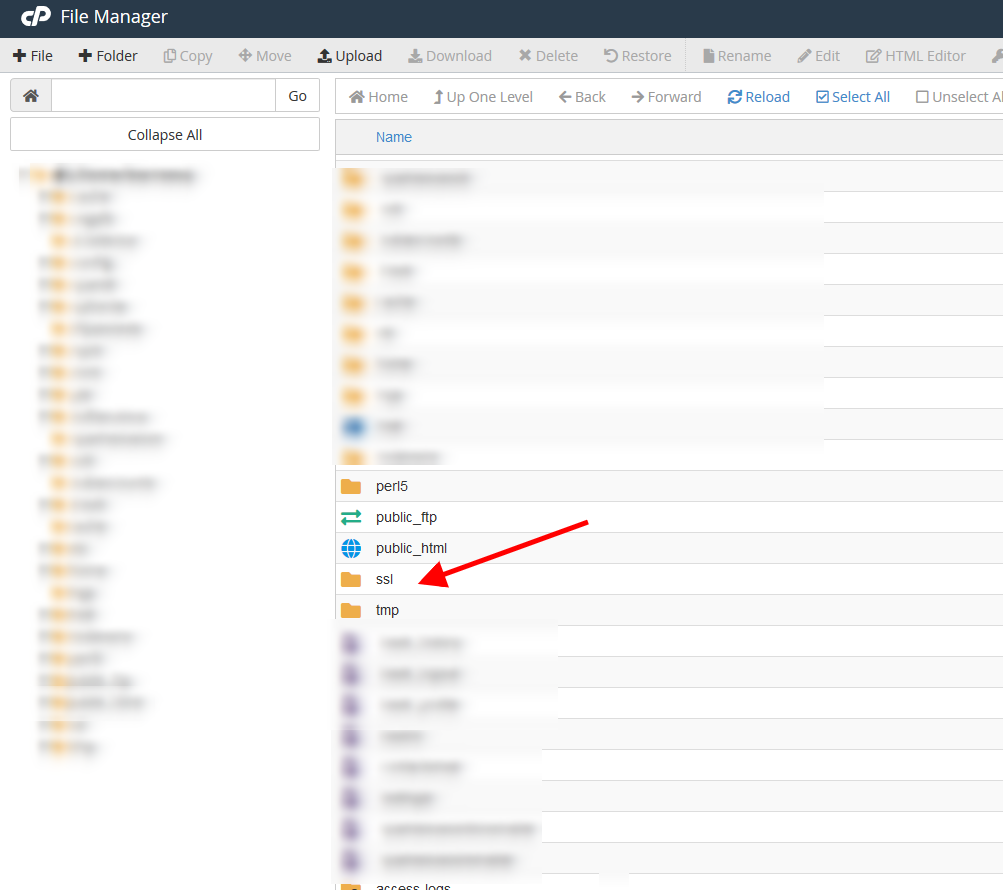
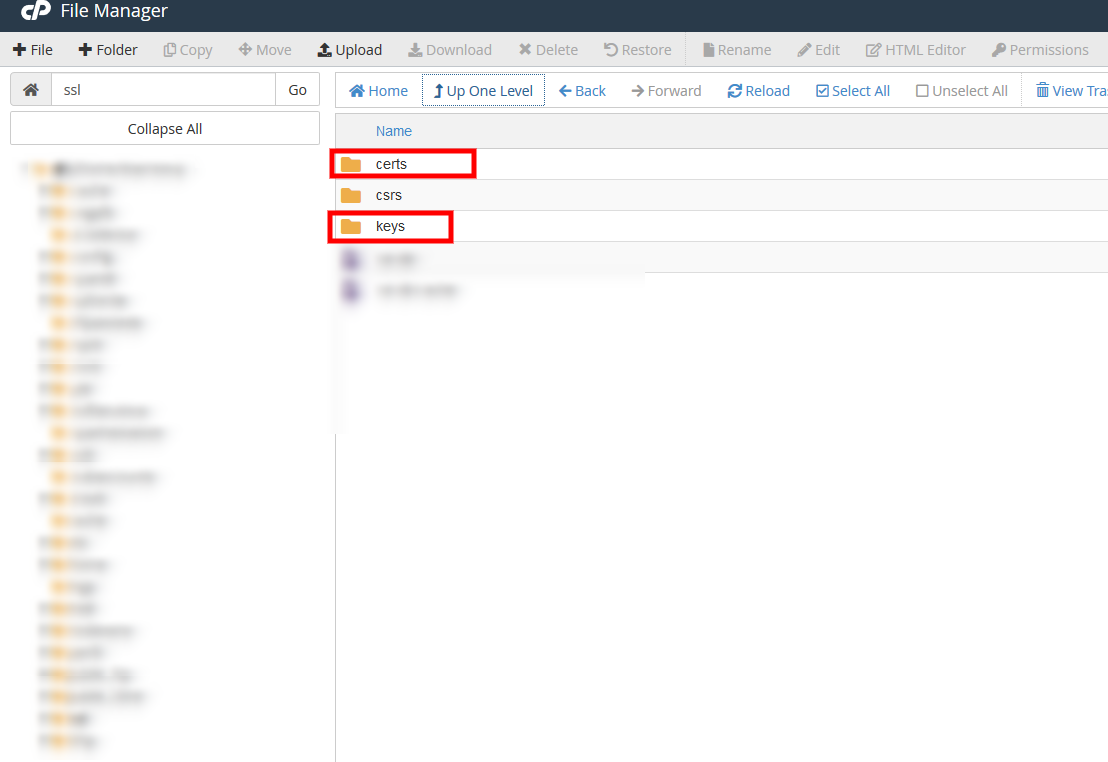
If you have used SSL certificate for you domain, then make sure that you have access to your certificate files on your cpanel.
Normally SSL certificate files could be found below path on cpanel.
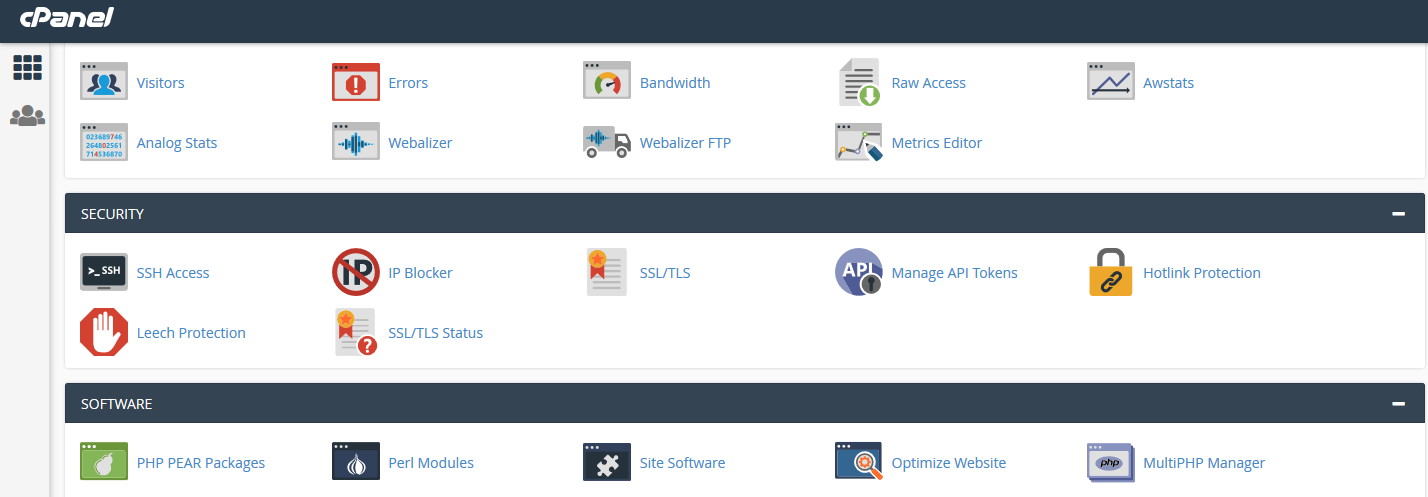
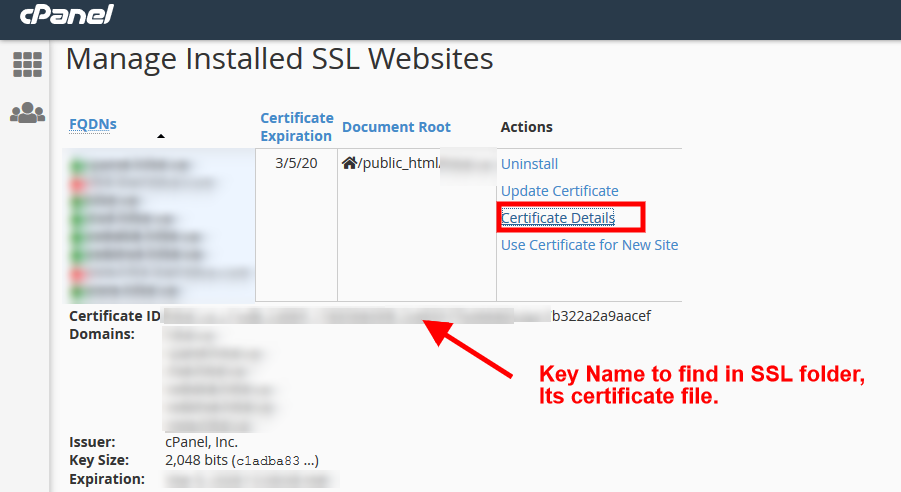
To make sure that which keys and cert file have used for SSL certificate, you can find that information on Cpanel SSL/TLS
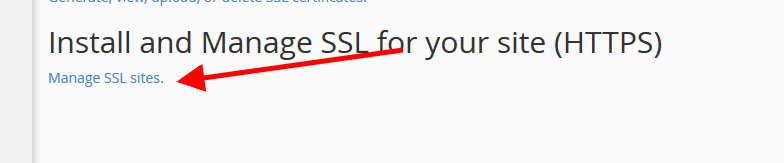
After that click on Manage SSL
After clinking on Managed SSL Sites.
Copy the name of certificate file and then go to SSL folder path. ( ssl/certs )
Download the file on you PC and then go to ssl/keys folder to download the key file.
After that go to you theme directory and create the below folder path in your theme js folder -> chat-cert folder.
if chat-cert folder is not exist then create chat-cert inside js folder and upload your downloaded key and cert file to this folder.
Now run the node server file from terminal like this node server-ssl.js
Note: Only Authorized certificates install on your domain will be recognize for your chat node server and no self-signed certificate will work on production server.
This below process is same for both situations either with SSL or without SSL.
Node JS Chat server only available or worked if terminal open, If you have mistakenly closed the terminal or logged out your session then the node chat server will be stop.
To run the node js chat app in background process install the npm process manager which is forever.
Run the below commands from your terminal.
npm install forever -g
It will install forever package globally, Note: If you have not installed forever globally then it will not work.
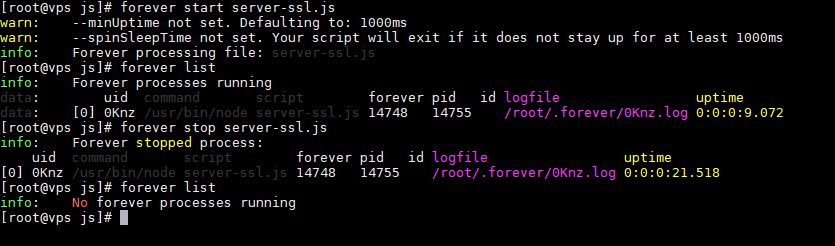
To start the node chat server run the following command.
forever start server-ssl.js
Do not bother the warnings it will run your application in background now.
To check which node processes are running on background enter the following command.
forever list
(It will list down the all running processes for node js)
And to stop the node chat server enter the below command.
forever stop server-ssl.js
For your eyes only
9. How to install Application on Local Server
1. Download package from codecanyon 2. Unzip the main-files and then copy the worketic folder and paste it on your local server 3. Start editing your .env file located in downloaded folder. Please make sure you have added the Correct database name, username and password. And copy the env file and paste into your project 3. Go to your project root level and run command > composer update 4. When composer update get completed then run this command (start server) > php artisan serve 5. Then type in your browser http://localhost:8000/install
And follow the instructions and wait while your demo is being import
Checkout Installation Video Guide:
10. Email Configuration
You need to configure the following settings in your .env file
MAIL_HOST: Your mail server host
MAIL_PORT: Your mail server port
MAIL_USERNAME: Your email id
MAIL_PASSWORD: your email password
MAIL_ENCRYPTION: If your MAIL_PORT=587 then MAIL_ENCRYPTION must be tls
and if your MAIL_PORT=465 then it must be ssl
MAIL_FROM_ADDRESS: Your Email Address
For Gmail server you need to do the following steps
If 2 Step Verification is Enabled:
If your 2 step verification is enabled in gmail account you need to do the following steps.
Login into Gmail.
Click on the "Google Account".
Click Security -> App Passwords
Select "Mail" as the app and "Other (Custom name)" as the device from the drop downs then click generate.
New window open with your 16 character app password . (Kindly copy this and keep it safe).
Know open your .env file and change the following setting